Renovating a bathroom in your Dallas-Fort Worth home can feel overwhelming when you want stylish updates yet need every inch to work for your family. A thoughtful plan protects your budget and helps you avoid mistakes that waste time and money. By focusing on a solid assessment, smart removal, and a functional redesign, you can create a modern bathroom that feels spacious and fits your lifestyle—without costly surprises. Start your project with a clear step-by-step approach and see how small changes make a big difference.
Table of Contents
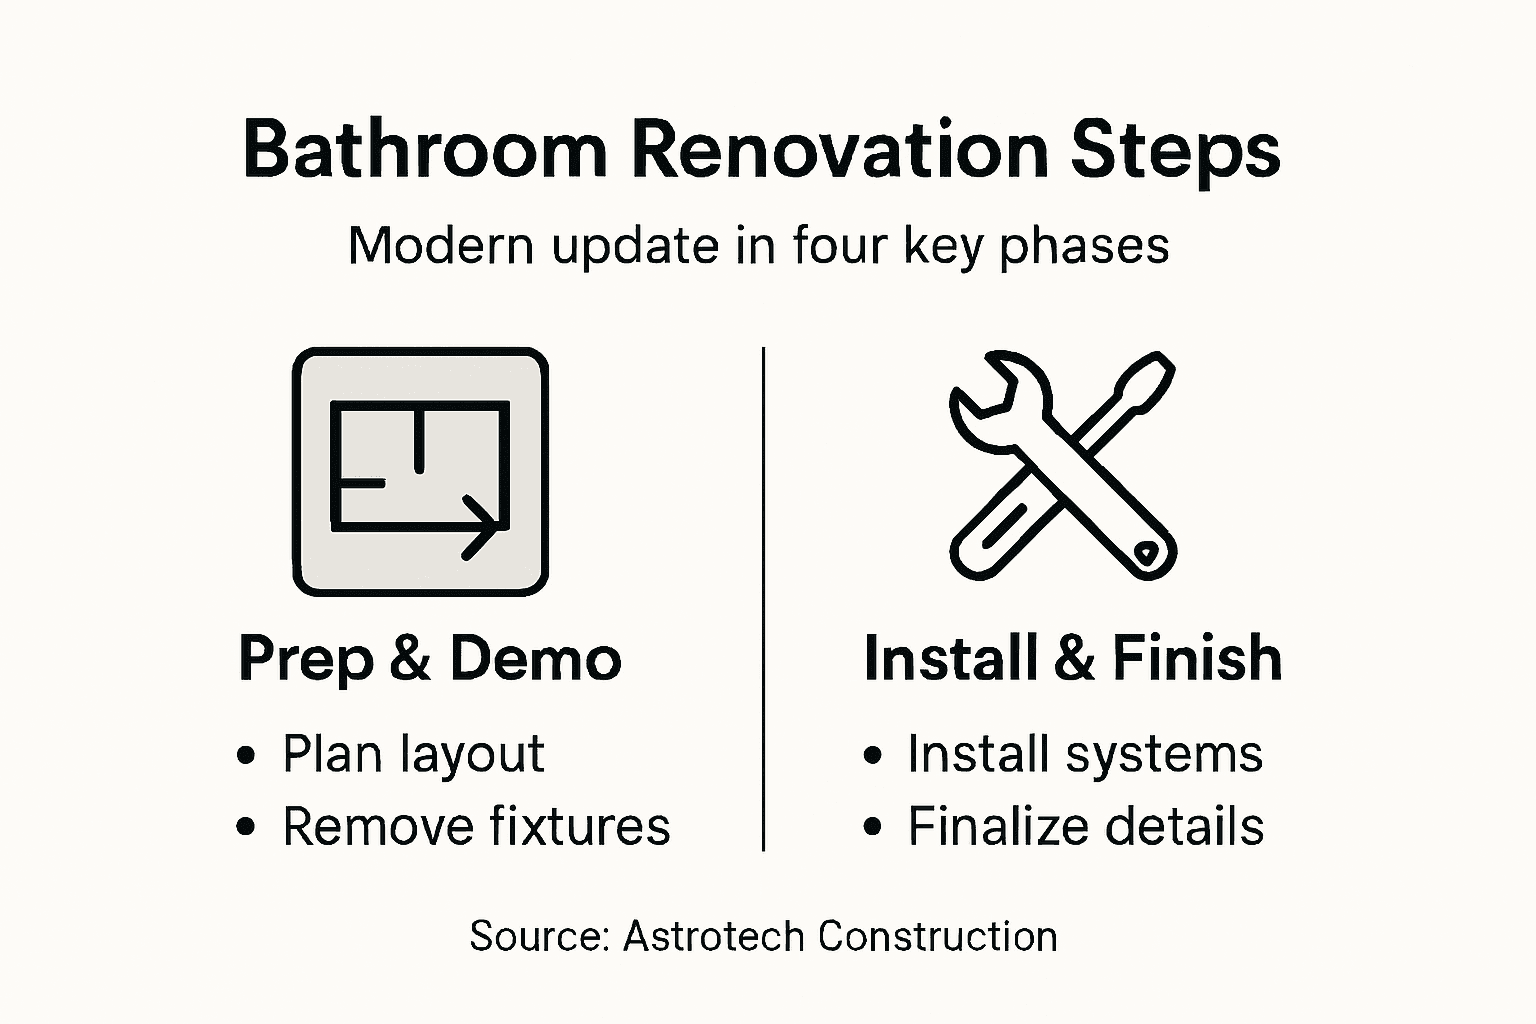
- Step 1: Assess Existing Bathroom And Plan Layout
- Step 2: Remove Outdated Fixtures And Prep Surfaces
- Step 3: Install New Plumbing, Electrical, And Finishes
- Step 4: Apply Quality Checks And Finalize Details
Quick Summary
| Key Point | Explanation |
|---|---|
| 1. Assess your bathroom layout | Measure dimensions and note fixed elements like plumbing and electrical locations before planning changes to avoid costly mistakes. |
| 2. Identify problem areas | Document issues such as cramped spaces or inadequate storage to ensure new designs address real pain points in your bathroom. |
| 3. Prepare surfaces thoroughly | Remove old fixtures and address any hidden damage like mold to create a solid foundation for new installations. |
| 4. Hire professionals wisely | Weigh the benefits and costs of hiring licensed experts versus DIY to ensure safety and compliance with building codes. |
| 5. Conduct comprehensive quality checks | Test plumbing and electrical systems, inspect caulking, and verify details to prevent future costly repairs and ensure everything functions correctly. |
Step 1: Assess existing bathroom and plan layout
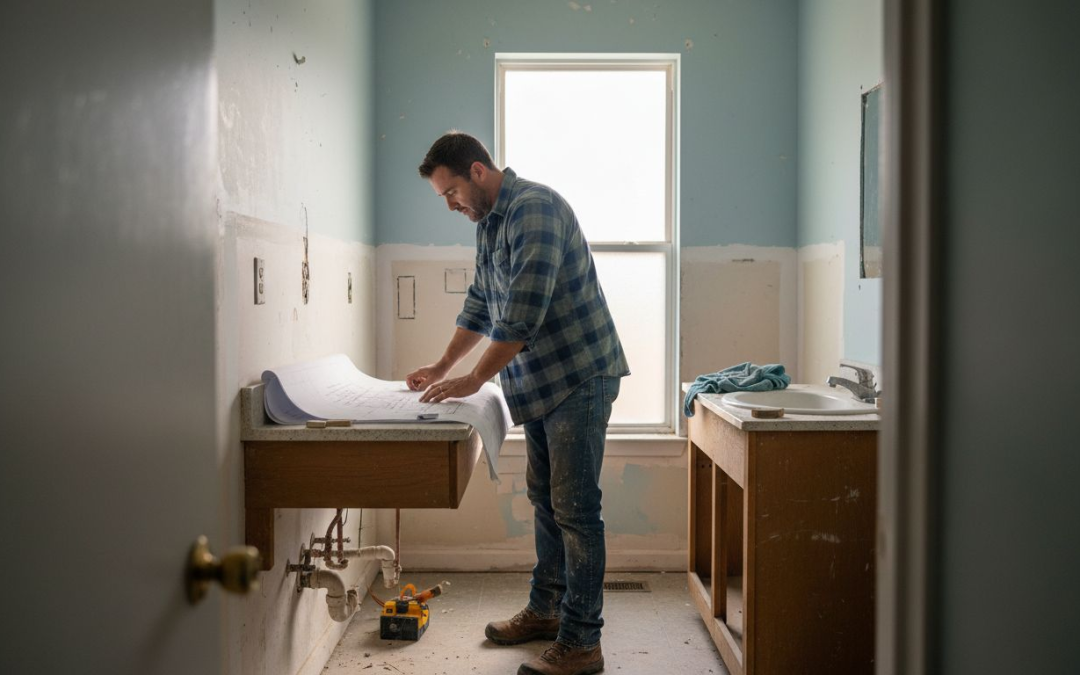
Before you tear down walls or order fixtures, you need to understand what you’re working with. Assessing your current bathroom and planning a functional new layout sets the foundation for your entire renovation. This step prevents costly mistakes and ensures your updated space actually works for your family’s needs.
Start by measuring your bathroom dimensions accurately. Grab a tape measure and document the width, length, and height of your space. Note the location of windows, doors, and any plumbing vents. These fixed elements often can’t be moved without significant expense, so they’ll anchor your new layout.
Next, identify your existing plumbing and electrical locations. Understanding bathroom accessibility standards will help you plan a functional layout whether you’re renovating for universal design or standard use. Mark where your main water supply enters, where drains are positioned, and where electrical outlets currently exist.
Document problem areas in your current bathroom. Is the toilet cramped? Does the shower lack ventilation? Are storage cabinets inadequate? These pain points should influence your new design. What frustrates you daily is what you’ll want to fix.
Here’s a summary of common bathroom renovation problem areas and their possible solutions:
| Problem Area | Typical Causes | Impact on Use | Potential Solution |
|---|---|---|---|
| Cramped toilet space | Poor layout, small room | Discomfort, difficult access | Adjust layout, opt for compact fixtures |
| Inadequate ventilation | Missing fan, blocked duct | Mold growth, poor air quality | Install exhaust fan, clear ducts |
| Limited storage | Small cabinets, clutter | Messy counters, frustration | Add shelves, use vertical space |
| Weak lighting | Few fixtures, wrong bulbs | Difficult grooming, safety risk | Upgrade lights, use LED bulbs |
| Poor water pressure | Old pipes, blockage | Slow filling, weak shower | Replace pipes, inspect valves |
Consider your lifestyle and how your family uses the bathroom. A busy household with multiple people getting ready simultaneously needs different layout solutions than a couple. Think about storage needs, counter space, and whether you want a separate shower and tub or a combination.
Create a rough sketch of your space with measurements noted. You don’t need professional drawings at this stage, just a realistic view of what fits where. This helps you visualize traffic flow and functionality before committing to expensive changes.
Review any building codes or HOA requirements that apply to your Dallas-Fort Worth home. Some renovations require permits, and code compliance affects layout decisions. When you’re ready to finalize plans, comprehensive bathroom remodel checklists can guide you through what needs addressing.
A solid layout plan saves thousands in avoidable changes during construction. Spend time on this step now.
Pro tip: Use your phone’s camera to photograph your current bathroom from multiple angles and take closeup shots of plumbing connections, fixtures, and problem areas. These photos become invaluable reference material when discussing options with contractors or designers.
Step 2: Remove outdated fixtures and prep surfaces
Once you’ve planned your layout, it’s time to clear out the old. Removing outdated fixtures and properly preparing surfaces ensures a solid foundation for your new bathroom. This phase requires careful work to avoid damage and address hidden issues like mold or lead hazards.
Start by turning off water supply to your bathroom. Locate the shutoff valve, typically under the sink or in a basement/utility area. Turn it clockwise until it stops. Turn on faucets to release any remaining water pressure and confirm the supply is off.
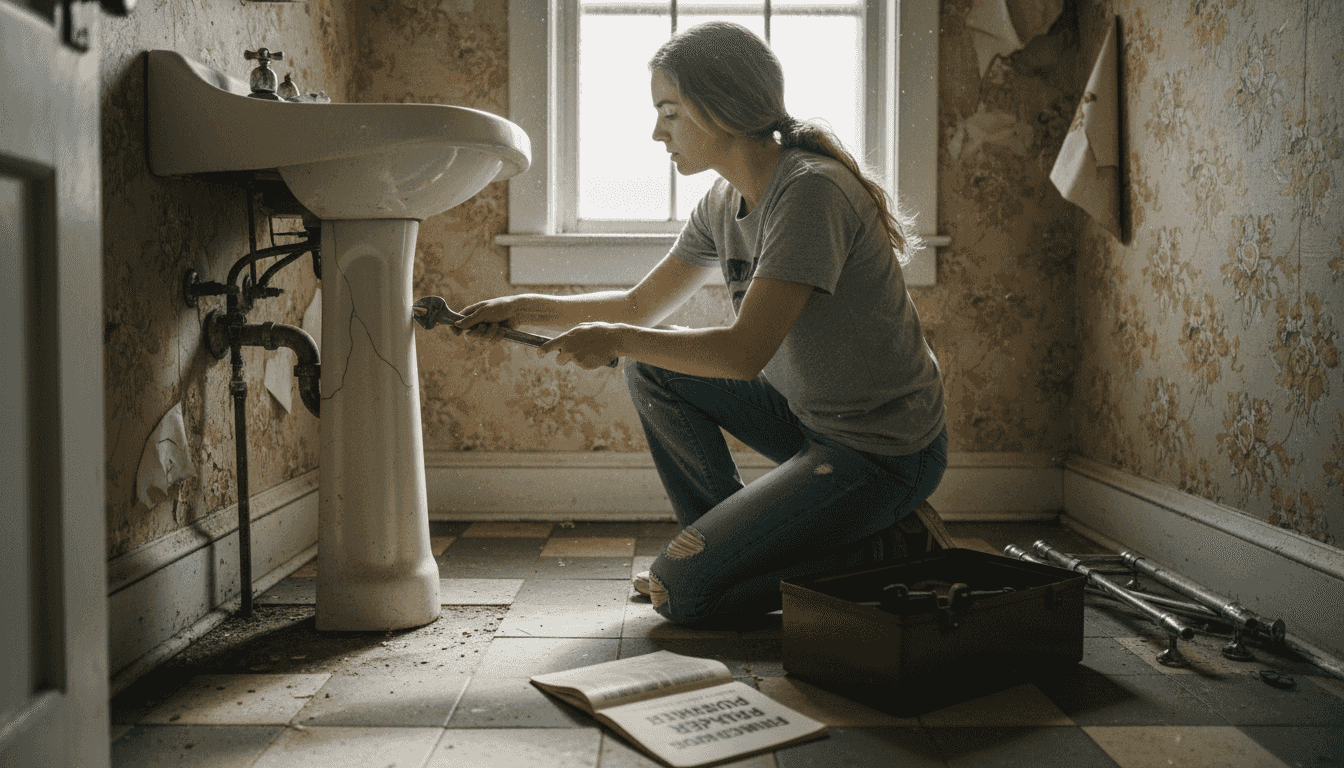
Remove fixtures methodically, starting with smaller items. Unscrew and detach faucets, towel bars, and mirrors. Use an adjustable wrench or socket set to disconnect supply lines from the toilet tank. For a toilet, you’ll also need to unbolt it from the floor flange.
When dealing with older homes, be aware of potential hazards. Check for lead-based paint in bathrooms if your home was built before 1978. If found, follow EPA guidelines for safe removal to protect your family.
After fixtures are out, inspect the surfaces underneath. Look for water damage, soft spots in flooring, or mold growth. These hidden problems must be addressed before new installations. Damaged areas need repair or replacement to prevent future issues.
Prepare walls and floors by cleaning thoroughly and removing old caulk, grout, or adhesive. Sand rough spots smooth. Remove any loose paint or wallpaper. A clean, smooth surface gives you the best foundation for new materials.
Check for mold or mildew and clean with a mold-killing solution. Ensure surfaces dry completely. Proper surface prep prevents your beautiful new bathroom from developing problems down the road.
Hidden damage discovered during removal is actually good news. You catch and fix it before spending money on new fixtures.
Pro tip: Rent a dumpster before you start demolition work. Old fixtures, tile, and materials add up quickly, and having convenient disposal on-site keeps the project moving smoothly and your home organized throughout the renovation.
Step 3: Install new plumbing, electrical, and finishes
This phase transforms your gutted bathroom into a functional space. Installing new plumbing, electrical systems, and fixtures requires precision and adherence to building codes. This is where many homeowners benefit from hiring licensed professionals, though understanding the process helps you oversee the work and make informed decisions.
Compare the advantages of hiring professionals versus DIY for bathroom renovations:
| Aspect | Licensed Professional | DIY Approach |
|---|---|---|
| Expertise | Knowledge of codes, standards | Relies on self-learning |
| Safety | Proper handling of hazards | Potential risk, inexperience |
| Inspection | Usually included, ensures compliance | May miss code requirements |
| Cost | Higher upfront, fewer mistakes | Lower upfront, costly errors |
| Warranty | Often provided, covers fixes | Typically none, self-responsible |
Plumbing installation begins with roughing in supply lines and drain pipes. Modern plumbing systems use updated materials like PEX tubing or copper that improve durability and water quality. Your contractor will position pipes according to your layout plan, ensuring proper slope for drain lines and secure mounting for supply lines.
Electrical work involves running new circuits, installing outlet boxes, and positioning switches and lights. Building codes require specific outlet placement in bathrooms, particularly near sinks. GFCI outlets are mandatory for safety in wet areas. All electrical work must follow local codes and typically requires inspection by a licensed electrician.
Once rough plumbing and electrical are complete, inspections happen before walls close up. This catches any code violations or installation errors before they’re hidden behind drywall. Never skip inspections, even if you’re confident in your contractor’s work.
Install backing boards where you’ll mount towel racks, shelves, or grab bars. Position them before drywall goes up. These reinforcements prevent damage and ensure fixtures stay secure long term.
Drywall installation follows inspections. Use moisture resistant drywall in bathrooms, especially around tubs and showers. Understanding modern plumbing design principles helps you appreciate why proper installation matters for your bathroom’s longevity and efficiency.
Finish work includes taping, mudding, and sanding drywall seams. Prime and paint walls. Install tile, flooring, and trim. Mount new fixtures like the toilet, sink, and faucet. This is where your bathroom starts looking like the space you envisioned.
Quality rough work hidden behind walls determines whether your bathroom stays problem-free for decades. Don’t rush this phase.
Pro tip: Take photos and video of all rough plumbing and electrical work before walls close up. These records become invaluable if you ever need to locate pipes or wires for future repairs or additions.
Step 4: Apply quality checks and finalize details
Your bathroom is nearly complete. Now comes the critical phase of verifying everything works safely and meets standards. Quality checks catch problems before you fully move in, saving headaches and potential costly repairs later.
Start by testing all plumbing fixtures. Turn on each faucet and check for leaks at connections. Run water in the shower and tub, ensuring proper drainage and no pooling. Flush the toilet multiple times and confirm it fills and drains smoothly. Check under sinks for any drips or moisture.
Test electrical safety next. All bathroom outlets should be GFCI protected. Use a GFCI tester to verify each outlet functions correctly. Flip light switches and confirm all lighting works as intended. Test exhaust fans to ensure they remove moisture effectively.
Verify ventilation is adequate. Your exhaust fan should run during and after showers to prevent mold growth. Check that ductwork is properly sealed and vents to the exterior, not into attic spaces.
Inspect caulking and grouting around tub, shower, and sink areas. Gaps allow water to seep behind surfaces, causing damage. Caulk should be smooth and complete with no cracks or missing sections.
Walk through using comprehensive bathroom inspection checklists that verify safety standards and functionality. These checklists ensure nothing gets overlooked. Test water pressure and temperature controls. Confirm grab bars are secure and positioned correctly for safety.
Document everything with photos. Record serial numbers of new fixtures and appliances for warranty purposes. Keep all receipts, warranties, and maintenance documentation organized.
Check that all trim, caulk, and paint details match your design vision. Small finishing touches make the space feel complete and polished.
A thorough final walkthrough prevents problems from becoming expensive issues after your contractor leaves the site.
Pro tip: Create a detailed punch list of any minor issues or touch-ups needed, and require your contractor to complete everything before final payment. This ensures accountability and prevents you from being left with unfinished details.
Transform Your Bathroom Renovation Vision into Reality with Expert Guidance
Planning a bathroom renovation can feel overwhelming when faced with challenges like cramped spaces, outdated plumbing, or inadequate ventilation. This step-by-step guide highlights critical pain points such as proper layout planning, careful removal of old fixtures, and precise installation of plumbing and electrical systems. Don’t let hidden issues or overlooked details compromise the safety and beauty of your new bathroom. Investing time in thorough assessment and quality checks pays off with lasting comfort and style.
If you are ready to move beyond planning and want professional support tailored to your Dallas-Fort Worth home, explore our comprehensive remodeling services at Uncategorized – Astrotech Construction.
Take the next step toward a modern, functional bathroom by contacting us today at Astrotech Construction. Our experienced team understands how to turn your renovation goals into exceptional results with unmatched quality and customer care. Don’t wait until small frustrations become costly repairs. Begin your transformation now with the trusted experts by your side.
Frequently Asked Questions
How do I assess my existing bathroom before renovation?
To assess your existing bathroom, start by accurately measuring the dimensions and noting fixed elements like plumbing and electrical outlets. Document problem areas that impact usability, such as cramped spaces or poor ventilation, to inform your new layout design.
What steps should I take for safe fixture removal during renovation?
To safely remove fixtures, first turn off the water supply and release any remaining pressure by turning on faucets. Proceed methodically by detaching smaller items before larger ones, and be cautious of potential hazards like lead-based paint in older homes.
What should I consider when installing new plumbing and electrical systems?
When installing new plumbing and electrical systems, ensure compliance with local building codes and safety standards. Hire licensed professionals for complex tasks, and verify that all installations are inspected before closing up walls to prevent future issues.
How can I verify that my bathroom renovation meets quality standards?
To ensure quality, test all plumbing fixtures for leaks and check the functionality of electrical outlets and lighting. Conduct a thorough final walkthrough using an inspection checklist to confirm that everything operates as intended and address any minor issues before completing the project.
What are some common issues to look for in my current bathroom?
Common issues to look for include cramped spaces, inadequate ventilation, and poor electrical setups. Identifying these pain points at the beginning can help you create a more functional layout that suits your family’s needs.
Recommended
- 7 Key Advantages of Bathroom Remodeling for Homeowners – Astrotech Construction
- Bathroom Upgrades: Everything You Need to Know – Astrotech Construction
- Modernize Your Living Space: Real Value for Homeowners – Astrotech Construction
- 7 Steps to a Successful Bathroom Remodel Checklist for DFW Homes – Astrotech Construction
- Shirley Gardens Conversion – UpKeep UK