Many homeowners think trim painting is just slapping color on baseboards. That misconception leads to peeling paint, uneven finishes, and wasted money. Trim painting requires precision preparation, the right materials, and proven techniques to protect your surfaces and enhance your home’s style. This guide clarifies what trim painting truly involves and delivers expert strategies tailored for Texas homes, ensuring lasting results that elevate your property value.
Table of Contents
- Understanding Trim: Definition And Types
- Why Trim Painting Matters: Benefits And Visual Impact
- Choosing The Right Paint And Finish For Trim
- Preparing Trim For Painting: Cleaning, Repair, And Sanding
- Common Misconceptions And Mistakes In Trim Painting
- Visual Design Strategies: Color And Style Choices For Trim
- Maintaining Your Painted Trim: Longevity And Repainting Cycles
- Transform Your Texas Home With Expert Trim Painting Services
- FAQ
Key takeaways
| Point | Details |
|---|---|
| Trim includes functional and decorative moldings | Baseboards, crown molding, door and window casings frame architectural elements. |
| Proper trim painting protects and adds value | Shields wood from moisture and wear while increasing property appeal. |
| Choosing the right paint type and finish matters | Semi-gloss finish with quality paint ensures durability in Texas climates. |
| Preparation is essential | Cleaning, sanding, and filling defects create a smooth, lasting finish. |
| Maintenance extends trim paint lifespan | Regular care prolongs paint life up to 10 years before repainting. |
Understanding trim: definition and types
Trim consists of architectural elements like baseboards, crown molding, door/window casings that enhance both aesthetics and functional space definition. These moldings frame walls, doors, windows, and ceilings, creating visual boundaries that give rooms polished character. Trim serves two critical roles: decoration and protection of edges where different surfaces meet.
Common trim types in Texas homes include:
- Crown molding: decorative trim along the ceiling line that adds elegance
- Baseboards: protective molding at floor level covering wall-floor joints
- Chair rails: horizontal molding positioned mid-wall to prevent chair damage
- Window casings: frames surrounding windows for clean finished appearance
- Door casings: moldings around doorways hiding gaps and adding definition
Trim varies between interior and exterior applications. Interior trim typically uses smoother profiles and lighter materials, while exterior trim demands weather-resistant construction to handle Texas heat and humidity. Understanding these differences helps you choose appropriate painting methods for each application.
Why trim painting matters: benefits and visual impact
Painting trim creates sharp edges that define room boundaries and highlight architectural features. These clean lines draw the eye and make spaces feel more intentional and finished. Without properly painted trim, even beautifully painted walls can look incomplete.
Proper trim painting protects surfaces from wear and moisture, and adds architectural detail increasing home value. Wood trim absorbs moisture, scratches easily, and shows daily wear in high-traffic areas like hallways and doorways. Quality paint forms a protective barrier that prevents damage and extends trim lifespan significantly.
Key benefits include:
- Enhanced curb appeal: crisp trim contrasts boost visual interest and property attractiveness
- Protection from elements: sealed trim resists moisture, scratches, and UV damage
- Increased property value: professionally painted trim signals maintenance and quality to buyers
- Design flexibility: trim color creates texture and style contrast complementing any interior palette
Well-painted trim transforms ordinary rooms into polished spaces that feel intentional and cared for, making the difference between a house and a home.
Choosing the right paint and finish for trim
Oil-based paints provide a durable, smooth finish ideal for high-traffic trim but take longer to dry and require solvents; latex dries faster and has lower VOCs but may be less durable. Your choice depends on durability needs, timeline, and environmental considerations for your specific Texas home conditions.
| Paint Type | Durability | Dry Time | Cleanup | Best For |
|---|---|---|---|---|
| Oil-based | Excellent | 24+ hours | Mineral spirits | High-traffic trim, doors |
| Latex | Good | 2-4 hours | Water | Low-traffic areas, quick projects |
| Acrylic-alkyd | Excellent | 6-8 hours | Water | All trim applications |
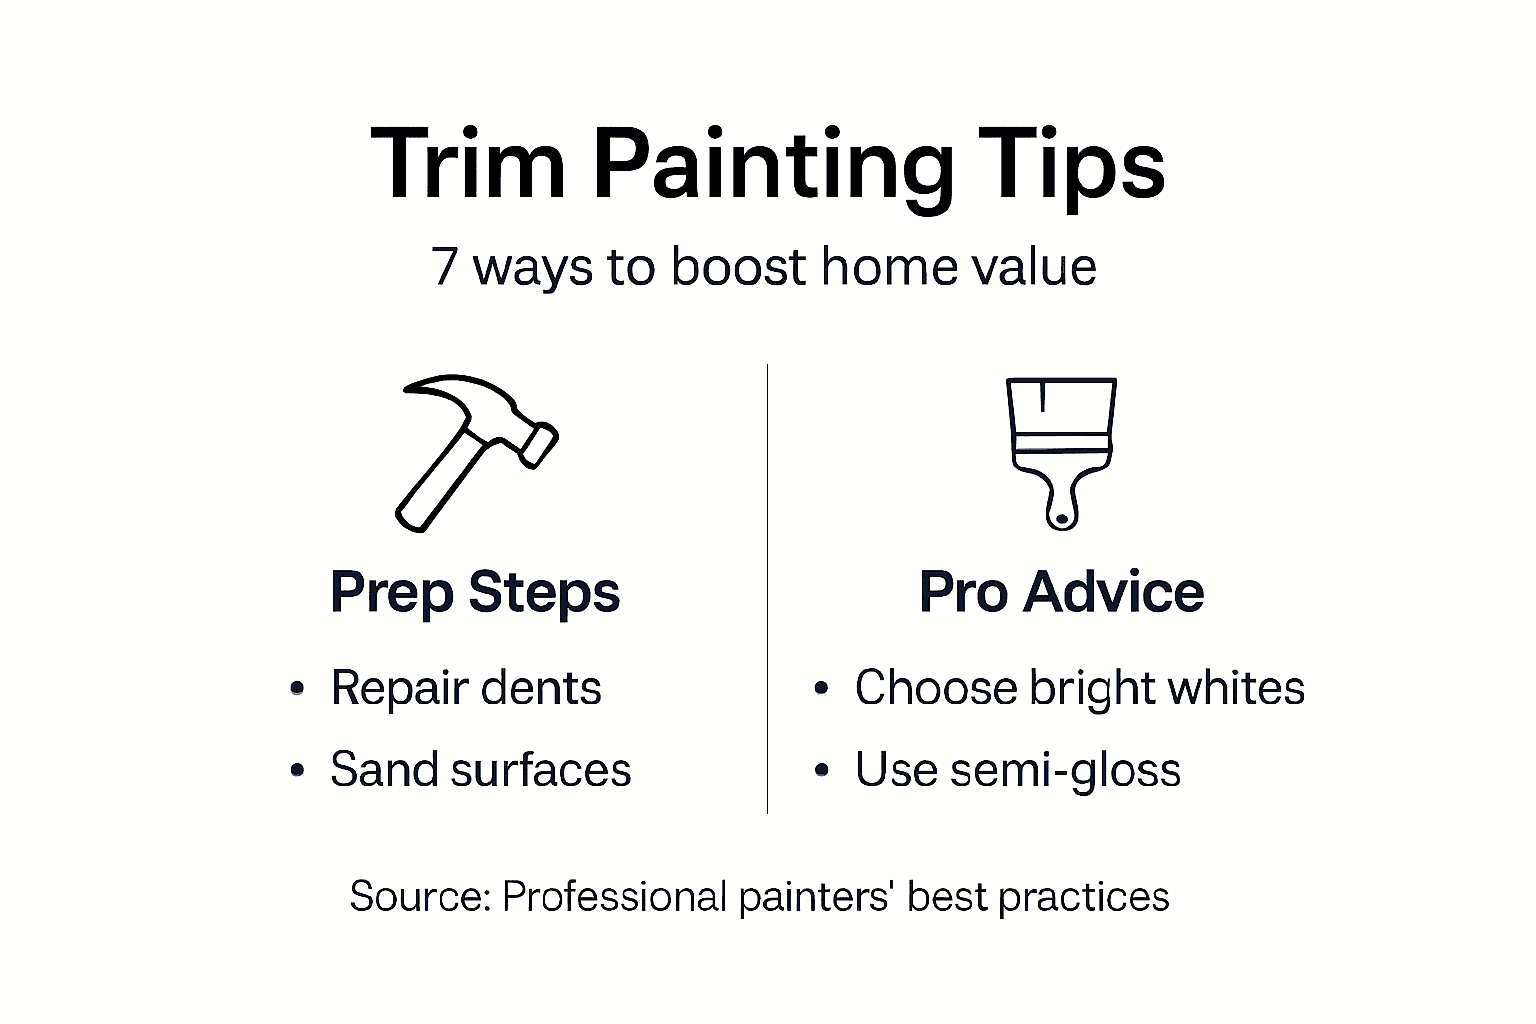
Semi-gloss finish is popular for trim due to its balance of durability, cleanability, and subtle shine. This finish reflects enough light to highlight trim details without appearing overly glossy. It wipes clean easily, making it perfect for baseboards and door frames that collect fingerprints and scuffs.
Best paint choices by application:
- High-traffic trim: acrylic-alkyd hybrids combining oil durability with easy cleanup
- Exterior trim: 100% acrylic latex formulated for UV and moisture resistance
- Interior decorative trim: premium latex in semi-gloss for quick projects
Pro Tip: Consider acrylic-alkyd hybrid paints offering oil-based durability with water cleanup. These formulas dry harder than standard latex but clean up without harsh solvents, perfect for busy homeowners tackling weekend projects.
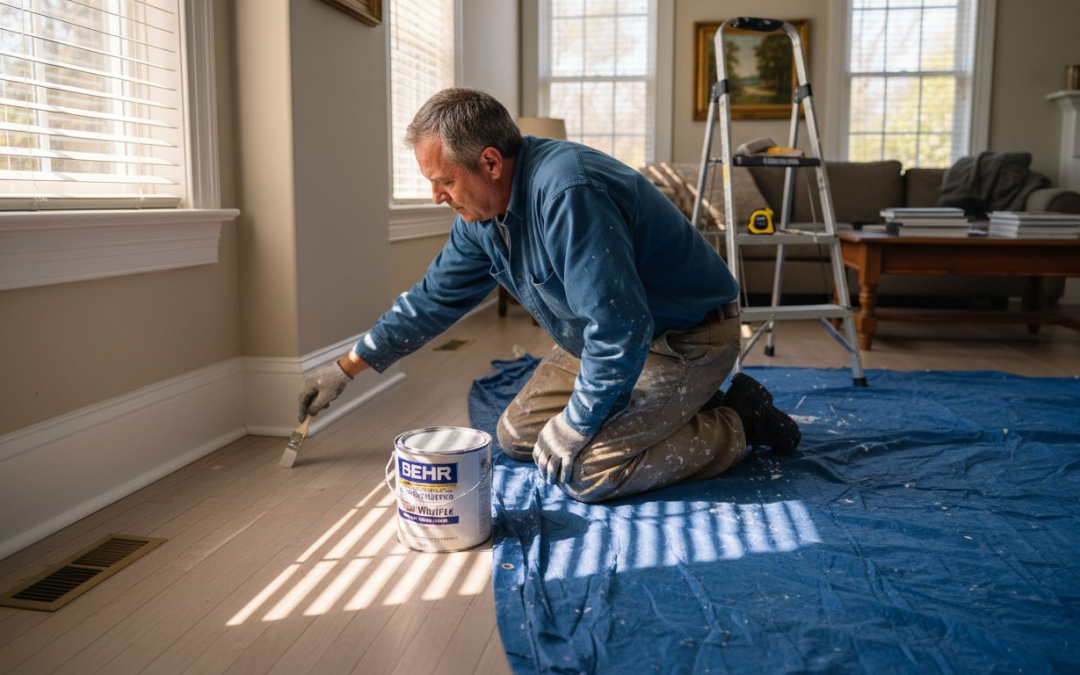
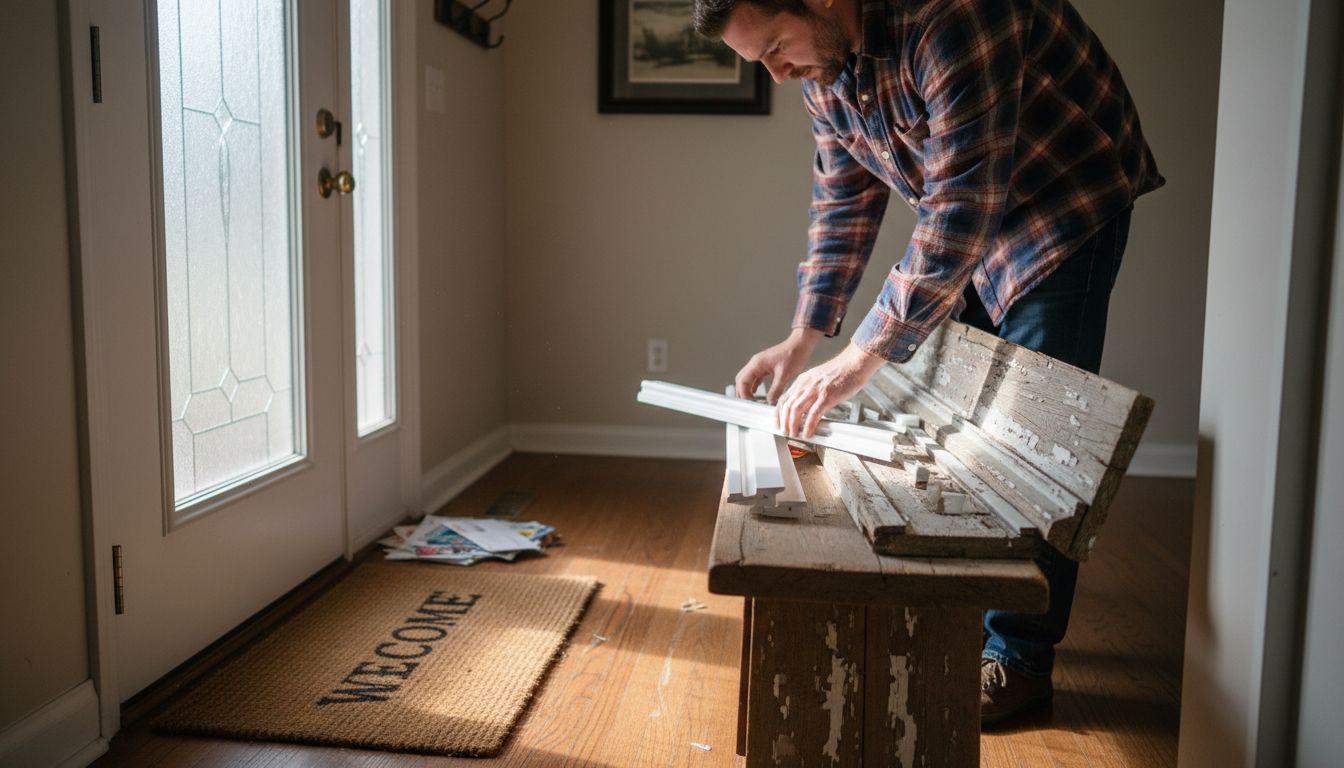
Preparing trim for painting: cleaning, repair, and sanding
Proper preparation including cleaning, sanding with 120-grit sandpaper, and repairing dents with wood filler is essential for a smooth, durable finish. Skipping prep steps guarantees poor adhesion and visible imperfections that no amount of quality paint can hide.
Follow this proven preparation workflow:
- Clean trim thoroughly using TSP or degreasing cleaner to remove dirt, grease, and grime that prevent adhesion.
- Fill holes and dents with wood filler, applying slightly overfilled for shrinkage, then let dry completely per manufacturer instructions.
- Lightly sand all trim surfaces with 120-grit sandpaper, focusing extra attention on glossy existing paint to create texture for new paint grip.
- Remove all sanding dust with a tack cloth or damp microfiber cloth, ensuring no particles remain to mar your finish.
- Address Texas-specific climate challenges by checking for moisture damage or swelling common in humid conditions.
- Wipe down with clean water and allow trim to dry completely before painting.
Interior trim requires special attention to detail during prep because imperfections show more dramatically in controlled indoor lighting. Take time to inspect closely under good light, feeling for rough spots you might miss visually.
Pro Tip: Always test a small hidden area after prep to check for adhesion problems early. Paint a two-inch square behind a door or inside a closet, let it cure 24 hours, then try to scratch it off with your fingernail. If paint lifts easily, you need more prep work.
Common misconceptions and mistakes in trim painting
Myth: Any paint works on trim. Correction: using wall paint on trim reduces lifespan and finish quality because wall paints lack the hardness and durability needed for surfaces that endure constant contact. Trim-specific paints cure harder and resist scuffing better than standard wall formulas.
Frequent errors that compromise results:
- Skipping sanding on glossy trim: leads to peeling and uneven finish because new paint cannot grip slick surfaces
- Neglecting repair of dents or holes: causes visible imperfections that telegraph through even multiple paint coats
- Underestimating prep time: rushing preparation compromises adhesion and shortens finish longevity by years
- Using cheap brushes: leaves visible brush marks and bristles stuck in your finish
- Painting over dirty trim: traps grime under paint creating texture and adhesion failure
The difference between amateur and professional trim painting is not talent but patience during preparation. Pros spend 70% of project time prepping and only 30% painting.
Common interior trim painting errors happen when homeowners rush to see quick results. You cannot shortcut the process without sacrificing quality. Each prep step serves a specific purpose that directly impacts your final outcome.
Pro Tip: Always sand glossy surfaces even if trim looks clean. That shine means the surface is too smooth for new paint to grip properly, guaranteeing future peeling no matter how good your paint quality.
Visual design strategies: color and style choices for trim
High contrast trim like white trim on dark walls creates sharp definition and visual interest that makes architectural features pop. This classic approach draws attention to moldings and casings, emphasizing the craftsmanship of your home’s construction. Dark trim on light walls offers a modern, sophisticated alternative gaining popularity.
Matching trim color closely with walls offers soft continuity and less formal style. This technique works beautifully in contemporary homes where you want seamless flow between spaces. The subtle approach makes rooms feel larger because hard boundaries disappear.
Trim color and style decisions to consider:
- High contrast combinations highlight architectural detail and create traditional formality
- Monochromatic schemes create calm, spacious feels perfect for smaller Texas homes
- Bold trim colors add personality and modern edge when walls stay neutral
- Natural wood-tone stained trim brings warmth but requires different prep than painted finishes
Texas lighting affects color perception significantly. Bright southern light makes colors appear more vibrant, while north-facing rooms may make trim look cooler. Test paint samples on trim in different lighting conditions before committing to full rooms.
Room purpose influences trim choices too. Formal spaces like dining rooms suit traditional white or cream trim, while casual family rooms allow bolder experimentation. Professional color consultation ensures cohesive design alignment throughout your home, preventing costly color regrets.
Maintaining your painted trim: longevity and repainting cycles
Trim paint typically lasts 7-10 years before repainting; regular inspections prevent moisture damage and deterioration. Actual lifespan depends on paint quality, prep thoroughness, traffic levels, and exposure to sunlight or moisture. High-traffic areas like hallways may need attention sooner than guest bedroom trim.
Maintenance routines that extend trim life:
- Clean trim quarterly with mild detergent and soft cloth to prevent buildup that degrades finish
- Inspect annually for chips, cracks, or moisture damage that signal needed repairs
- Touch up small damaged areas immediately to prevent expansion requiring extensive repainting
- Monitor exterior trim closely for weather damage after severe Texas storms
- Address water leaks promptly as moisture is trim paint’s worst enemy
Frequent gentle cleaning prevents grime buildup better than occasional aggressive scrubbing. Use pH-neutral cleaners and soft microfiber cloths, avoiding abrasive pads that scratch the finish. For stubborn marks, try a magic eraser sponge with light pressure.
Regular inspection identifies problems when they are small and cheap to fix. Walk through your home seasonally looking for new chips, cracks, or color changes indicating moisture intrusion. Catching issues early protects your investment and preserves your home’s polished appearance for years.
Transform your Texas home with expert trim painting services
You now understand what professional trim painting involves and why shortcuts fail. Astrotech Construction delivers expert home upgrade services tailored for Texas climates and homeowner needs, ensuring durable, beautiful finishes that increase your property value. Our proven process handles every detail from surface prep through final inspection.

Our experienced team brings precision craftsmanship and quality materials to every project. We use premium paints formulated for Texas conditions and apply proven techniques that ensure lasting results. Our interior design workflow creates cohesive, stylish spaces including perfectly painted trim that complements your entire home aesthetic. Contact us today to schedule a consultation and discover how professional trim painting transforms your living spaces.
FAQ
What is the best paint finish for trim in Texas homes?
Semi-gloss is the most recommended finish for Texas trim due to its durability, ease of cleaning, and subtle sheen. It balances aesthetic appeal with practical needs in humid and hot climates, resisting moisture better than flat finishes while staying less shiny than high-gloss.
How often should I repaint my trim?
Typically every 7-10 years depending on wear and exposure to traffic, sunlight, and moisture. Regular inspection helps catch damage early to extend paint life. High-traffic areas may need attention sooner than protected trim in low-use spaces.
Can I use any paint for trim, or are special paints required?
Use paint formulated specifically for trim, as it offers better durability and finish quality than wall paint. Generic wall paints usually lack the toughness needed for high-traffic trim areas that endure constant contact and cleaning.
What preparation is needed before painting trim?
Thorough cleaning, filling dents with wood filler, and sanding glossy surfaces are essential steps for professional results. Proper prep ensures adhesion and creates a smooth, lasting finish that protects your investment for years. Skipping preparation guarantees poor outcomes regardless of paint quality.
Does trim color affect room size perception?
Yes, lighter trim makes rooms feel larger while dark trim can make spaces feel smaller but more intimate. Matching trim closely to wall color creates seamless flow that expands visual space, while high contrast trim emphasizes boundaries making rooms feel more defined and formal.