Storm damage hits Dallas-Fort Worth homes hard each year, leaving siding cracked, dented, or compromised. Many homeowners rush into replacement without understanding local weather challenges or proper installation techniques, leading to moisture damage that can cost 40% more to fix later. This guide walks you through assessment, material selection, installation steps, and maintenance strategies specifically tailored for DFW conditions, helping you protect your home investment and avoid costly mistakes.
Table of Contents
- Understanding Siding Damage In Dallas-Fort Worth Storms
- Prerequisites: What You Need Before Starting Siding Replacement
- Step-By-Step Siding Replacement Process
- Common Mistakes And Troubleshooting Tips
- Cost, Timeline, And Expected Outcomes For Dallas-Fort Worth Homeowners
- Working With Local Contractors And Insurance Coordination
- Post-Replacement Care And Maintenance For Longevity
- Protect Your Dallas-Fort Worth Home With Expert Siding Services
- Frequently Asked Questions
Key Takeaways
| Point | Details |
|---|---|
| Storm damage requires accurate assessment to tailor repair scope | Document all visible and hidden damage before planning your replacement project |
| Choose siding materials resistant to hail and wind common in Dallas-Fort Worth | Vinyl offers cost efficiency while fiber cement provides superior durability against severe weather |
| Proper installation and sealing prevent costly moisture damage | Following manufacturer guidelines and local building codes protects your home’s structure |
| Working with licensed local contractors eases insurance and improves results | Certified professionals navigate claims faster and deliver higher quality installations |
| Regular maintenance extends siding lifespan and protects investment | Annual inspections and prompt repairs maximize your siding’s performance over decades |
Understanding Siding Damage in Dallas-Fort Worth Storms
Dallas-Fort Worth faces some of the most aggressive weather patterns in Texas. Severe hail storms and straight-line winds strike the metroplex regularly, battering home exteriors with ice chunks and debris.
Common siding damage includes visible dents from hail impact, cracks that split panels lengthwise, and chipped paint that exposes underlying materials to moisture. Some damage hides beneath the surface, where impact weakens structural integrity without leaving obvious marks. Over 68,150 restoration projects across the region illustrate just how frequently storms compromise siding, making replacement a necessity rather than an option for many homeowners.
“The frequency of severe weather events in North Texas means siding takes a beating year after year. What starts as minor cosmetic damage quickly becomes a structural concern when water finds its way behind compromised panels.”
Recognizing damage early prevents small problems from escalating. Check for:
- Visible dents or holes in siding panels
- Loose or missing sections after wind events
- Warped panels that no longer lay flat
- Water stains on interior walls indicating moisture penetration
- Soft spots that compress when pressed
If you suspect storm damage, consider professional storm damage repair in Dallas-Fort Worth services to conduct thorough assessments. Insurance claims often require detailed documentation, and certified contractors know exactly what adjusters need to see.
Prerequisites: What You Need Before Starting Siding Replacement
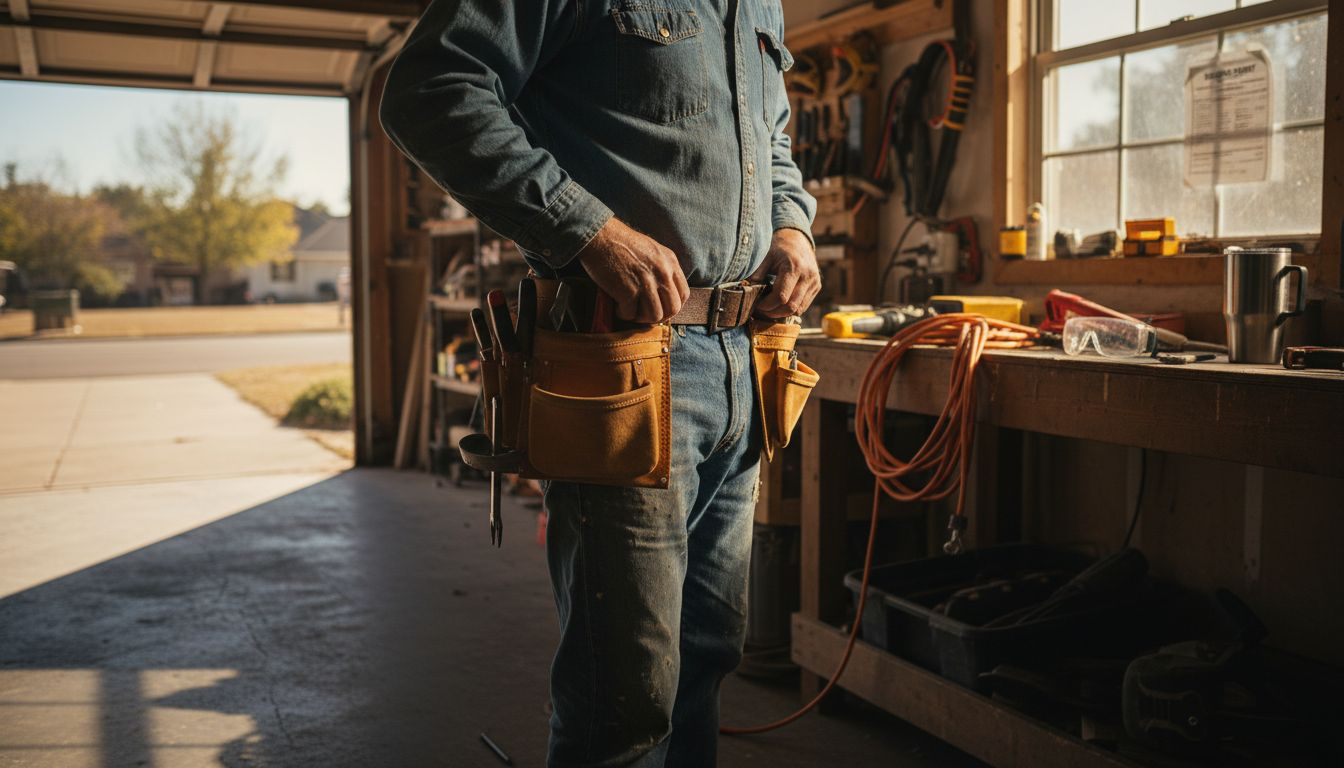
Successful siding replacement starts long before removing the first panel. Gathering the right tools, understanding local requirements, and making informed decisions about DIY versus professional help sets the foundation for quality results.
Assessment Tools and Safety Equipment
| Category | Essential Items | Purpose |
|---|---|---|
| Assessment | Moisture meter, inspection mirror, flashlight | Detect hidden water damage and access tight spaces |
| Safety Gear | Work gloves, safety goggles, respirator mask | Protect against debris, dust, and sharp edges |
| Access | Stable scaffolding or ladder system | Safely reach all exterior walls and upper stories |
| Documentation | Camera, measuring tape, notepad | Record damage for insurance and planning |
Before breaking ground, understand Dallas-Fort Worth building codes and permit requirements. Most municipalities require permits for siding replacement, especially when removing existing materials down to sheathing. Permit fees typically run $200 to $500 but ensure your project meets safety standards and maintains your home’s resale value.
DIY vs. Professional Installation
Deciding between DIY and hiring licensed contractors depends on several factors. Consider:
- Your experience level with exterior home projects
- Project scope and complexity
- Available time and physical capability
- Insurance claim coordination needs
- Long-term warranty requirements
Small, ground-level repairs might suit confident DIYers, but extensive replacement or multi-story homes demand professional expertise. Licensed contractors bring code knowledge, proper equipment, and insurance that protects you from liability.
Pro Tip: Review our step-by-step siding replacement guide to understand the full process before committing to DIY. Many homeowners realize midway through that professional help would have saved time and prevented mistakes.
Step-by-Step Siding Replacement Process
Replacing siding systematically ensures quality results that withstand DFW weather for decades. Follow these phases to complete your project correctly.
Phase 1: Damage Assessment and Documentation
- Inspect all exterior walls in daylight, noting every damaged section
- Use a moisture meter to check for water infiltration behind siding
- Photograph damage from multiple angles for insurance documentation
- Mark affected areas with painter’s tape for clear identification
- Get written estimates from at least three licensed contractors
Phase 2: Material Selection
Choosing the right siding material balances budget, durability, and aesthetics. Here’s how popular options compare for Dallas-Fort Worth conditions:
| Material | Lifespan | Hail Resistance | Cost per Sq Ft | Maintenance Level |
|---|---|---|---|---|
| Vinyl | 20-30 years | Moderate | $3-$7 | Low |
| Fiber Cement | 40-50 years | Excellent | $6-$12 | Moderate |
| Wood | 15-25 years | Poor | $5-$10 | High |
| Metal | 30-40 years | Excellent | $7-$15 | Low |
Vinyl siding offers cost efficiency and easy maintenance, making it popular for budget-conscious projects. Fiber cement provides superior durability against hail and wind, justifying higher upfront costs through longer lifespan and better protection.
Phase 3: Removal and Preparation
- Carefully remove damaged siding panels starting from the top
- Inspect underlying house wrap and sheathing for damage
- Replace any compromised moisture barriers or structural elements
- Clean the surface thoroughly before installing new materials
Pro Tip: Save a few intact pieces of your old siding as samples. They help contractors match colors and styles if you’re doing partial replacement, which can reduce costs by 30-50% compared to full projects when damage is localized.
Phase 4: Installation
- Install starter strips level and straight along the bottom edge
- Begin panel installation from bottom to top, following manufacturer specs
- Maintain proper expansion gaps to account for temperature changes
- Nail through designated slots without over-tightening
- Interlock panels securely while checking alignment every few rows
Phase 5: Sealing and Finishing
- Apply weatherproof sealant around windows, doors, and trim
- Install corner posts and trim pieces for clean transitions
- Add protective coatings per manufacturer guidelines
- Conduct final inspection checking for gaps, misalignment, or loose sections
Understanding these steps helps whether you’re managing a DIY project or overseeing professional work. Learn more about siding replacement protection and upgrades to enhance your home’s defense against future storms. For detailed storm-specific repairs, our storm damage siding repair tutorial provides additional guidance, and you can find comprehensive steps in our siding replacement step-by-step resource.
For those seeking professional help, finding the perfect local siding contractor ensures you partner with experienced teams familiar with DFW conditions.
Common Mistakes and Troubleshooting Tips
Even experienced installers encounter problems during siding replacement. Recognizing and fixing these issues early prevents expensive repairs down the road.
Sealing and Moisture Problems
Improper sealing leads to moisture ingress that rots wall cavities and destroys insulation. Always use sealants recommended by your siding manufacturer, applying continuous beads around every penetration. Water finds the smallest gaps, so thorough sealing at windows, doors, vents, and utility connections is non-negotiable.
Alignment and Installation Errors
Panel misalignment creates gaps that let water penetrate and makes your home look unprofessional. Common causes include:
- Skipping regular level checks during installation
- Failing to account for foundation irregularities
- Over-driving nails that buckle panels
- Ignoring manufacturer spacing requirements
Measure and level carefully at every stage. Use a 4-foot level for vertical checks and a string line for horizontal alignment across long runs.
Incomplete Damage Assessment
Many homeowners miss hidden damage during initial inspections, leading to surprises mid-project. What appears as surface damage often indicates deeper structural issues. Moisture that breached old siding may have compromised sheathing, framing, or insulation.
Consider professional evaluation even if you plan DIY installation. Contractors trained in proper siding installation spot problems invisible to untrained eyes, saving you from discovering them after new siding goes up.
Skipping Protective Coatings
Some materials require additional protective treatments after installation. Skipping these coatings results in premature siding failure despite correct installation. Always follow manufacturer guidelines completely, even when steps seem optional.
Pro Tip: Take photos at every installation phase. If problems emerge later, these images help contractors diagnose issues and determine whether installation errors or material defects caused the failure. Documentation protects your warranty and insurance claims.
Cost, Timeline, and Expected Outcomes for Dallas-Fort Worth Homeowners
Understanding financial investment and project duration helps you plan effectively and set realistic expectations for your siding replacement.
Project Costs
Average siding replacement in Dallas-Fort Worth ranges from $12,000 to $18,000 for typical single-family homes. Several factors influence final costs:
- Material choice and quality grade
- Total square footage of exterior walls
- Complexity of architectural features
- Extent of underlying damage requiring repair
- Labor rates for licensed contractors
- Permit fees and inspection costs
Partial replacement for localized storm damage costs significantly less, sometimes as low as $3,000 to $6,000 depending on affected areas.
Timeline Expectations
| Project Scope | Typical Duration | Weather Delays |
|---|---|---|
| Partial repair | 3-5 days | Add 1-2 days |
| Single story full replacement | 1-2 weeks | Add 3-5 days |
| Multi-story full replacement | 2-3 weeks | Add 5-7 days |
Weather significantly impacts schedules in Dallas-Fort Worth. Summer heat slows work pace, while spring storms cause frequent delays. Plan projects for fall when conditions typically remain stable.
Longevity and Performance
Quality installation directly correlates with durability:
- Vinyl siding lasts 20-30 years with minimal maintenance
- Fiber cement endures 40-50 years when properly cared for
- Metal options survive 30-40 years with occasional repainting
- Wood requires extensive upkeep but can last 25+ years
New siding immediately improves curb appeal and energy efficiency. Properly installed materials reduce heating and cooling costs by improving insulation and eliminating air leaks. Your home’s value increases, and you gain peace of mind knowing your exterior can handle whatever North Texas weather throws at it.
Explore local siding contractor options to compare pricing and services, or browse comprehensive home remodeling services in DFW for additional exterior upgrades that complement new siding.
Working with Local Contractors and Insurance Coordination
Navigating contractor selection and insurance claims simultaneously feels overwhelming. Following a structured approach simplifies both processes and improves outcomes.
Selecting Certified Local Contractors
Prioritize licensed, insured contractors with specific Dallas-Fort Worth storm damage experience. Local professionals understand regional building codes, typical weather challenges, and insurance company expectations. Their familiarity with adjusters and claim processes accelerates approvals and reduces back-and-forth.
Research contractor qualifications thoroughly:
- Verify active licenses through Texas Department of Licensing
- Confirm general liability and workers compensation insurance
- Read recent reviews on multiple platforms
- Request references from storm damage projects
- Check Better Business Bureau ratings and complaint history
Reputable contractors welcome scrutiny and readily provide documentation. Those who hesitate or pressure immediate commitments raise red flags.
Insurance Claim Coordination
Experienced contractors streamline insurance claims by documenting damage professionally and communicating effectively with adjusters. Over 60% of homeowners report smoother claims and faster repairs when working with certified local contractors experienced in Dallas-Fort Worth storm damage.
Contractors who specialize in storm damage repair services often handle claim paperwork, attend adjuster meetings, and negotiate fair settlements on your behalf. This expertise proves invaluable when insurance companies initially underestimate damage or deny legitimate claims.
“Working with a contractor who speaks insurance language transforms the claims process. They know what documentation adjusters need and how to present damage in terms that trigger approvals.”
Communication Best Practices
Maintain clear communication throughout your project:
- Establish a primary contact person on the contractor’s team
- Schedule regular progress updates via your preferred method
- Document all agreements and changes in writing
- Ask questions immediately when confusion arises
- Keep copies of all contracts, invoices, and correspondence
Good contractors proactively communicate delays, material changes, or unexpected discoveries. They respect your property, clean up daily, and address concerns promptly.
For comprehensive guidance on contractor selection, review our resource on how to hire contractors in Dallas-Fort Worth and find additional tips for choosing Dallas siding contractors.
Post-Replacement Care and Maintenance for Longevity
New siding represents a significant investment that requires ongoing care to deliver decades of protection. Establishing maintenance routines now prevents premature failure and maximizes your return.
Routine Inspection Schedule
Perform visual inspections twice yearly, ideally in spring and fall. Look for:
- Cracks, chips, or holes in individual panels
- Gaps in sealant around windows and doors
- Loose or missing sections after wind events
- Signs of moisture like water stains or soft spots
- Pest damage or nesting attempts
Catch small issues early before they escalate into expensive repairs. Most problems take minutes to fix initially but require major work if ignored.
Cleaning and Debris Removal
Clean siding annually to remove dirt, algae, and debris that trap moisture against surfaces. Use a soft brush or low-pressure washer, working from top to bottom. Avoid high-pressure settings that damage panels or force water behind siding.
Trim vegetation at least 12 inches away from exterior walls. Plants touching siding hold moisture, promote mold growth, and provide highways for pests. Maintain gutters and downspouts to prevent water overflow that saturates siding unnecessarily.
Prompt Repair Protocol
Address damage immediately when discovered. Small cracks admit water that spreads through wall cavities, causing rot and mold. Replace individual damaged panels rather than waiting for problems to multiply.
Keep spare siding panels stored properly for quick repairs. Temperature fluctuations in attics or garages can warp materials, so choose climate-controlled storage when possible.
Maintenance Enhancement Tips
- Apply fresh caulk around penetrations every 3-5 years
- Repaint wood siding every 5-7 years or as needed
- Check and tighten loose panels after severe storms
- Monitor attic ventilation to prevent moisture buildup
- Update weatherstripping around siding edges
Pro Tip: Create a digital maintenance log with photos documenting your siding’s condition at installation and after each inspection. This record proves invaluable for warranty claims, insurance disputes, and resale disclosures. It also helps you track which areas need attention most frequently.
Consistent maintenance extends your siding’s lifespan by years and protects the structural investment underneath. Set calendar reminders for inspections and cleaning so tasks don’t slip through the cracks during busy seasons.
Protect Your Dallas-Fort Worth Home with Expert Siding Services
Navigating siding replacement after storm damage requires local expertise and proven installation techniques. While this guide equips you with essential knowledge, partnering with experienced professionals ensures lasting results that stand up to North Texas weather.
Astrotech Construction brings decades of experience to Dallas-Fort Worth homeowners facing siding replacement and storm damage restoration. Our certified teams understand local building codes, work directly with insurance adjusters, and deliver quality craftsmanship backed by comprehensive warranties. From initial damage assessment through final inspection, we handle every detail so your home receives the protection it deserves.
Explore our professional siding replacement services designed specifically for DFW conditions, discover full home remodeling solutions in Dallas-Fort Worth that transform your entire exterior, or connect with our storm damage repair experts for immediate assistance after severe weather events.
Frequently Asked Questions
What is the typical lifespan of new siding in Dallas-Fort Worth?
Vinyl siding typically lasts 20-30 years in Dallas-Fort Worth conditions, while fiber cement can extend up to 50 years with proper maintenance. The intense sun, hail storms, and temperature swings common to North Texas impact longevity, making material choice and installation quality crucial. Regular inspections and prompt repairs extend these timelines by preventing small damage from escalating into major failures.
Can I repair only the damaged sections instead of full siding replacement?
Partial replacement often suffices for localized storm damage and can reduce costs by 30-50% compared to full replacement projects. Carefully evaluate damage extent with a professional to determine if repairs maintain structural integrity and aesthetic consistency. Matching existing siding colors and styles becomes challenging with older installations, so sometimes full replacement provides better long-term value despite higher upfront costs.
How do I choose between DIY and professional siding replacement?
DIY suits small, ground-level projects when you have construction experience and proper safety equipment. However, professionals ensure code compliance, proper sealing techniques, and higher quality results, especially for multi-story homes or extensive damage. Licensed contractors also coordinate insurance claims more effectively and provide warranties that protect your investment, making professional installation worthwhile for most homeowners.
What safety precautions are essential during siding replacement?
Always use personal protective equipment including work gloves, safety goggles, and respirator masks when working with siding materials. Secure scaffolding with proper fall protection becomes critical for any work above ground level, as falls cause the majority of serious construction injuries. Never skip safety protocols even for small projects, and consider professional help for anything involving heights or complex access challenges.
How long does a typical siding replacement project take?
Most siding replacement projects finish within one to three weeks depending on home size, weather conditions, and damage extent. Partial repairs may complete in just three to five days, while multi-story full replacements require longer timelines. Efficient planning, experienced contractors, and favorable weather help projects stay on schedule, though spring storms and summer heat often cause delays in Dallas-Fort Worth.
Recommended
- How to Upgrade Home Siding: 20% Energy Savings Guide – Astrotech Construction
- Siding Contractor in Colleyville Southlake Trophy Club Bedford TX
- 7 Common DFW Remodeling Mistakes and How to Avoid Them – Astrotech Construction
- Siding Replacement Step by Step for Lasting Results – Astrotech Construction